What this article covers:
Prerequisites before connecting Trello Power-Ups
- Ensure you've added Unito to your Trello board.
- Grant Unito access to your Trello account.
Connect tools and choose flow direction:
Open the Trello board you want to build a flow for. Click on the button for the Power-Up you want to use (e.g. Board Sync).

Click Create flow.

You can then change the flow direction from the default two-way flow to a one-way flow. This can help you create flows that fit your specific use case — such as a Trello Master Board — but often you’ll want to keep it as a two-way relationship.
Once that's done, click next and set rules for your flow.
Find out more about flow direction.
Set Up Filtering Rules (Optional):
Narrow down what syncs using rules like:- Include only cards with specific labels.
- Sync cards from certain lists.
- Focus on tasks assigned to a particular person.
- Filter by card priority.
By default, Unito will sync all new work items (e.g., tasks, tickets, issues, etc.) between tools from a chosen project unless you tell it otherwise. This is where we can do that:
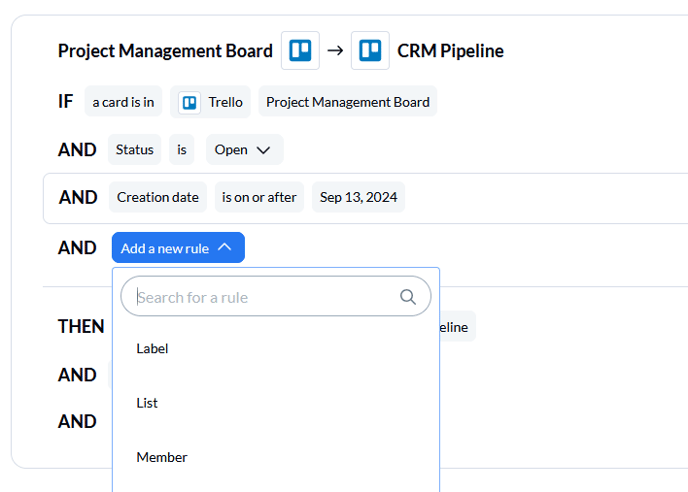
Here are some of the rules you can use with Unito:
-
Excluding cards with a specific label
-
Including or excluding cards in specific lists
-
Only syncing cards assigned to a specific person
-
Only syncing a certain type of card (such as High Priority)
Linking fields between tools with mappings
- Unito auto-maps common fields (title, due date, etc.).
- Click "Add mapping" to set up your mappings.
- Select the fields you want to sync in each tool.
Trello titles, due dates, lists, and comments will sync together automatically.
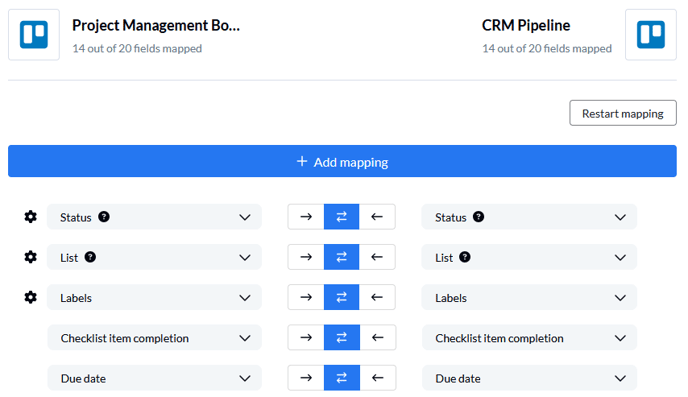
But if you need to customize your field mappings, just click on Add mapping. Then pick your mappings in each dropdown.
Here's how to map fields in Unito. Here are additional field configuration options.
Finalize and launch your flow
- Ensure "Auto-sync" is on for real-time updates.
- Click "Launch Flow" and you're done!
