Table of contents:
How to join a Unito workspace
The first thing you need to do is click on the invitation link you received by email.
Once you do, you'll be taken to a Unito sign-up screen:
 You can create an account with Unito with your email address and a password, or by signing in using your existing Google, Asana, or Trello account.
Once you've signed up, you'll be automatically taken to the dashboard of the workspace that you were invited to.
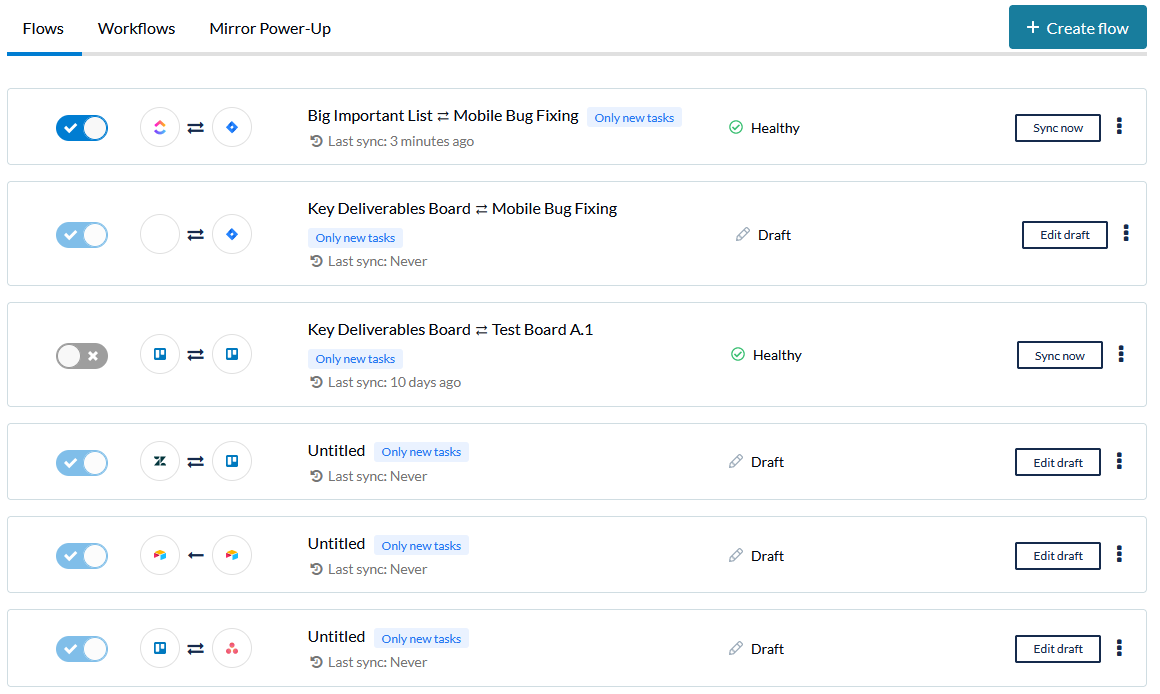
If the person inviting you has already created a few Unito flows, you'll see something like this.
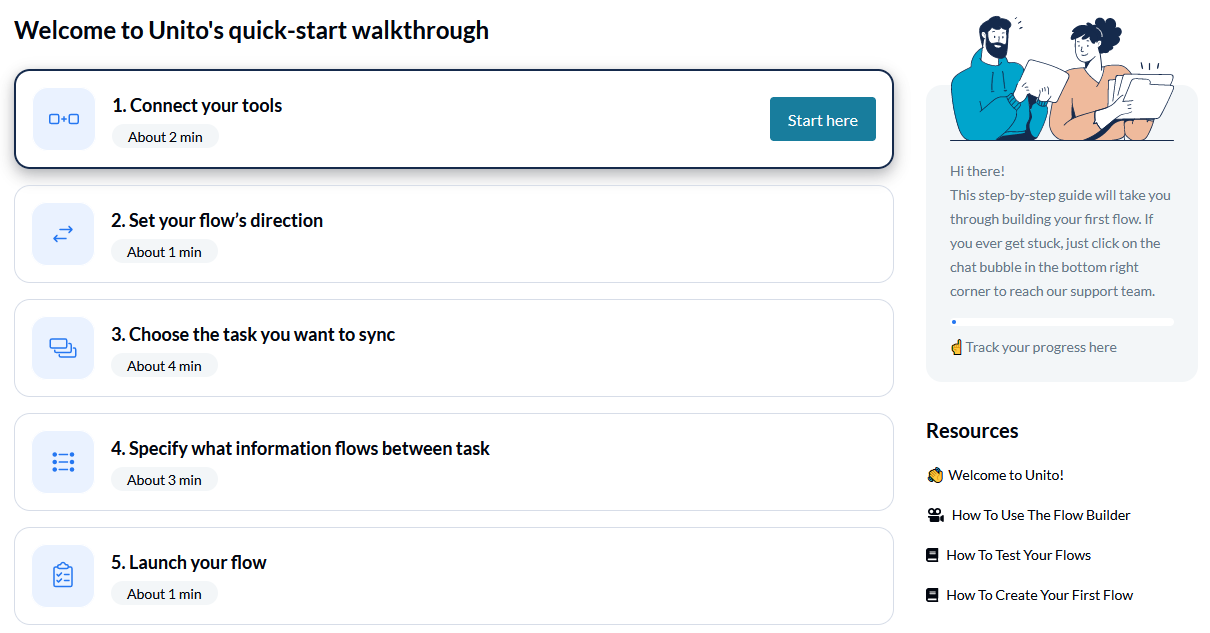
Otherwise, you'll be taken right to our quick-start walkthrough, where you can create your workspace's first Unito flow!
Now, let's go over some of the most common first steps you might want to take when you're invited to a Unito workspace.
Here are the steps involved in creating a new flow
-
Connect your tools: Add your tool accounts to Unito so we can start integrating them.
-
Set flow direction: By default, Unito syncs information back and forth between tools, but you can also make this a one-way relationship.
-
Build rules: With rules, you can control the flow of information between tools.
-
Customize field mappings: Unito automatically maps similar fields across tools, but you can tailor these mappings to your use case.
That's all you need to know! You can always go back to your flow to fine-tune it later, so feel free to test things out.
Editing an existing flow
Maybe the person who invited you has already created all the flows your workspace needs, but they need you to double-check a few things. No problem! It's easy to edit an existing flow.

Next, go to the flow you want to edit and click on the three little dots.
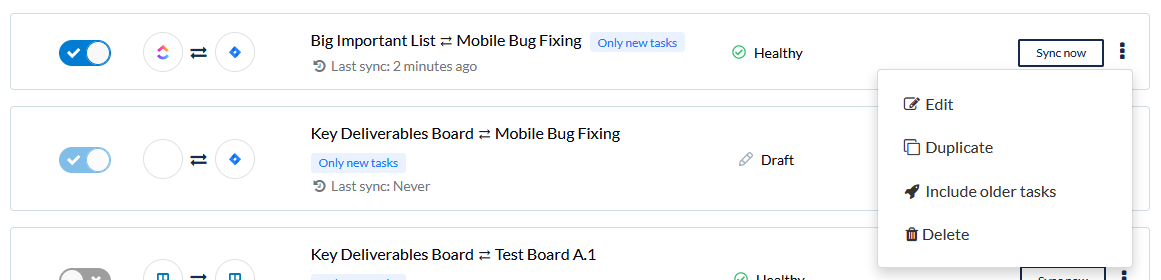
Click on Edit.
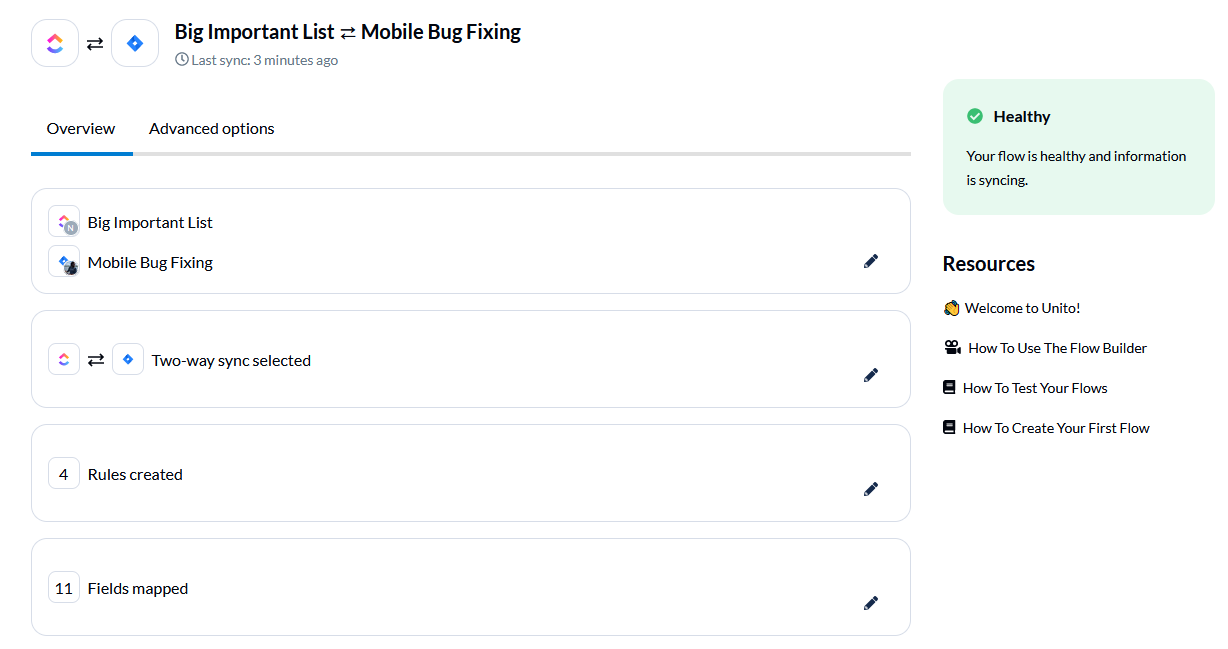
You'll see an overview of the flow here, and you can make changes to any aspect of the flow. Say you wanted to adjust the flows' rules. All you need to do is click on the pencil to the right of the Rules created line.

And you'll be taken to the rules screen.
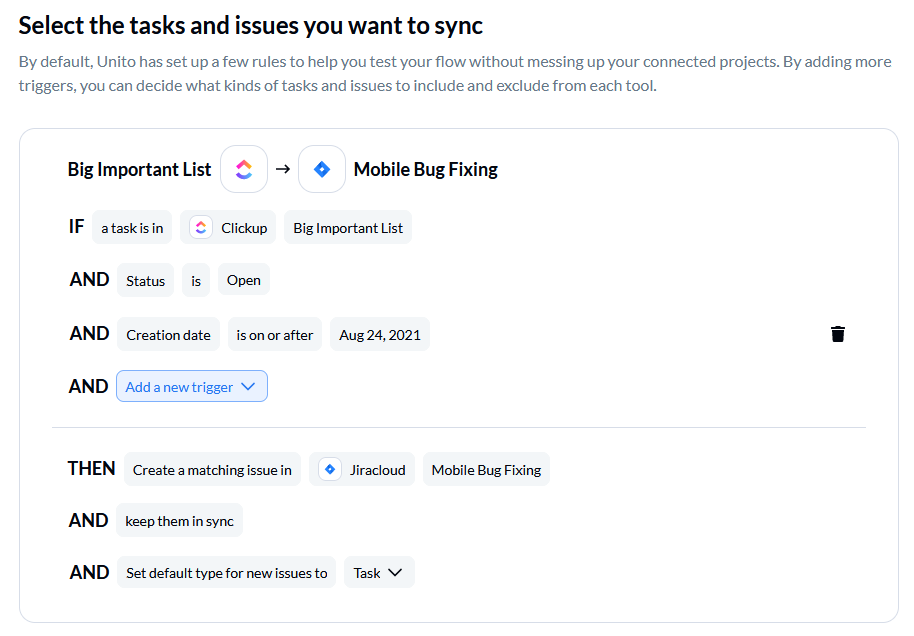
Make the changes you need to, go back to the overview, hit Save, and you're done.
Checking billing information
You might not be the one creating flows; just the one paying for them. No problem! Click on the avatar at the top right of the screen.
You'll get this dropdown.

Just click on Usage & billing. You'll be taken to a page something like this:

If your workspace is still on a trial, you can view which plans are available and purchase a subscription in-app.
If you want to update your credit card information, you can click Billing Information.
If you've already chosen a plan, you can also see your Billing History.