Table of contents:
Create a shared Notion service account
Only one Notion user per workspace can connect to an app like Unito — this is a limitation from Notion’s API.
You could create a service account (AKA a bot account) in your Notion workspace for the sole purpose of syncing your pages. All you'd have to do is make sure that account has access to all pages and databases you plan on connecting to Unito.
If multiple users try to connect the same Notion account to different Unito workspaces or log-in to your workspace with different email addresses, your Notion flows may stop working as intended. So if you don't use a service account, be sure to only give Unito access to people on your team who absolutely need it.
Connecting Notion to your Unito workspace
After signing up for Unito, you can add Notion to your Unito workspace in one of two ways. Either when creating a new flow or through the Integrations page. Both steps are described in this article on how to connect tools to Unito.
If you're new to Unito, you can read more about our Notion integration here.
Connect Notion to Unito
From your Unito dashboard, simply click Connect a new tool and look for Notion in the list of options.

Alternatively, If you’re working in a brand new Unito workspace, you’ll be taken right to Unito’s quick-start walkthrough.
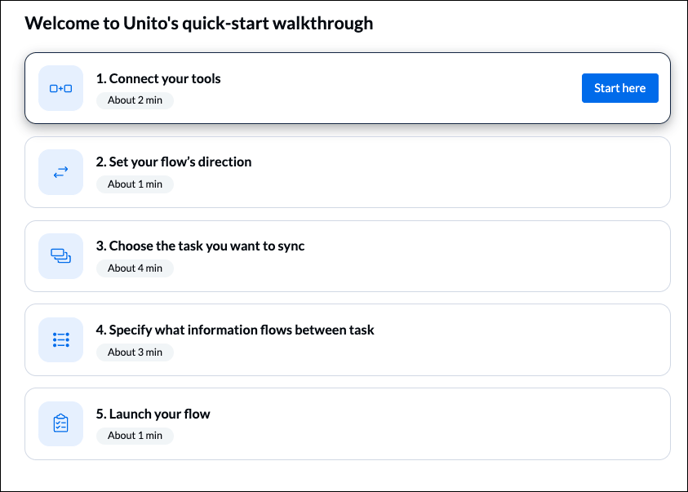
Click Start here, then + Add a tool to this flow and search for (or select) Notion.
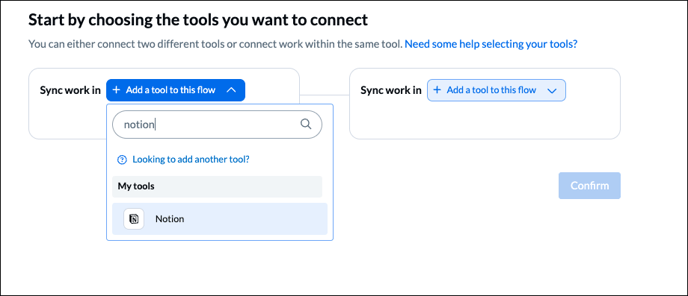
Click on + Choose account, then + Connect a new Notion account.
Select Notion pages to sync
Follow the on-screen instructions to log in to Notion (if you aren't already) until you see this screen, where you’ll be asked to give Unito permission to access your Notion workspace.
Click on Select pages.

Next, you can choose exactly which pages to give Unito access to:
 Make sure the ones you want to sync are checked. Feel free to uncheck any pages you don’t want to sync.
Verify each connection in Notion
You can verify whether or not Unito has access to a page you want to sync by going to the page and clicking on the ellipsis (...) in the top-right corner. you should see Unito 2-way Sync in your list of connections.

If you later add a new page to your Notion workspace, you don’t need to re-authorize Unito. Just go to the Share menu, and invite Unito, making sure to include Can edit permissions.
And that’s it! You’ve connected Notion to your Unito workspace, and you can start syncing information to and from Notion. Just add another tool to your workspace and create your first flow.
IMPORTANT: Only one Notion user per workspace can connect to Unito — this is a limitation from Notion’s API. We recommend setting up a shared account for your team's Notion flows.
If multiple Notion users attempt to login to your organization's Unito account to create flows, it may cause previously created flows to stop functioning.
Adding a Notion database to Unito
You can sync pages from any Notion database in your account as long as you have edit permission in that database. Here's an example of how databases appear in Unito:
