What this article covers:
Unito's default setting for flow changes
If you create a flow and then later decide to adjust it, say by adding or removing a field mapping, those changes will only be applied to work items (e.g., tasks, tickets, spreadsheets etc.) that are created or updated afterwards.
After saving changes, you may see a notification like this one: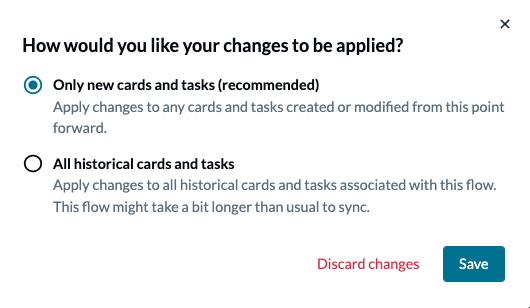
This is a safeguard to ensure that new changes to your flow function as expected. You could try creating a new work item before applying the changes to historical work items just to be safe.
There are a few reasons why we do this by default:
-
Your most important work items — those that are actively in use — get updated quickly.
-
Changes to flow settings can lead to multiple notifications for your team or department as their tasks, tickets, issues, etc. are rapidly updated or changed.
-
The tools we integrate have rate limits, meaning they'll delay or stop updates if you make too many changes at once. With this setting on by default, you're less likely to hit a tool's rate limit.
In most cases, it's best to keep this default setting.
Syncing all historical work items
Sometimes, the default setting might not be right for your use case. In these situations, you can apply flow changes to all historical data so that updates are processed throughout your workspace.
One way you sync all historical work items is by removing one of the pre-set conditions of your rules:
We include this condition in every new flow so that you can test it out before syncing all historical work items. You can remove it by clicking on the trash or bin icon.
Another way to do this is through the Most recent activity window. You may see a screen like this after creating your flow:
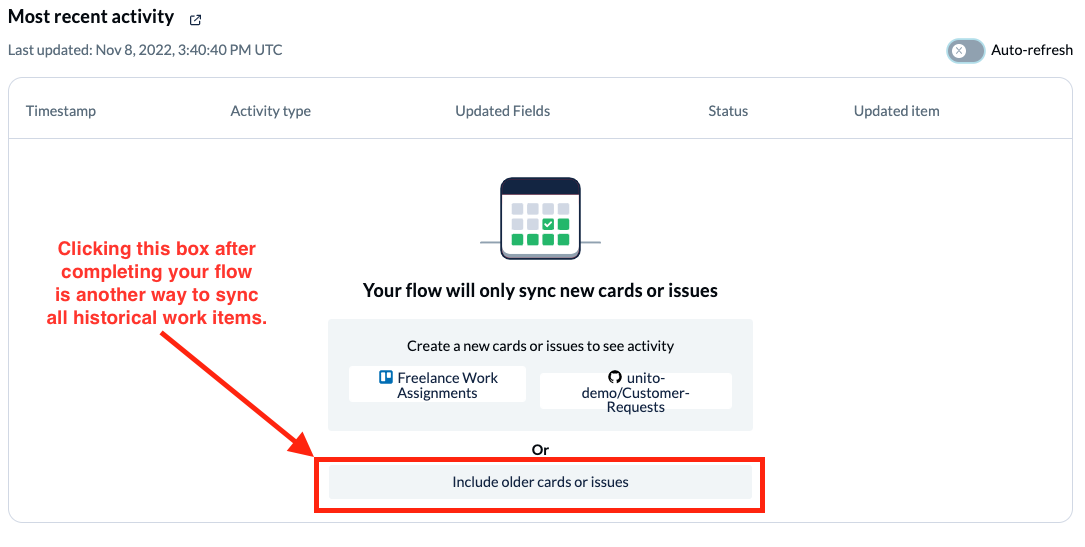
Clicking that box and following the on-screen instructions is another way to achieve the same goal.
Just keep a few things in mind before syncing older work items, since doing so may affect your flow's performance:
-
If your Unito flow needs to re-sync hundreds (or thousands) of work items, you may need to wait several hours for all the changes to appear.
-
Depending on your work app settings, team members could get a significant number of notifications as historical data is updated.
-
If we're still processing the changes made in your flow and you force a different flow to sync additional changes, you'll have to wait for all those changes to sync properly. This is to avoid hitting a tool's rate limits by sending too many requests at once.
Choosing between default syncing and full historical syncing
There's one last method to sync all historical data.
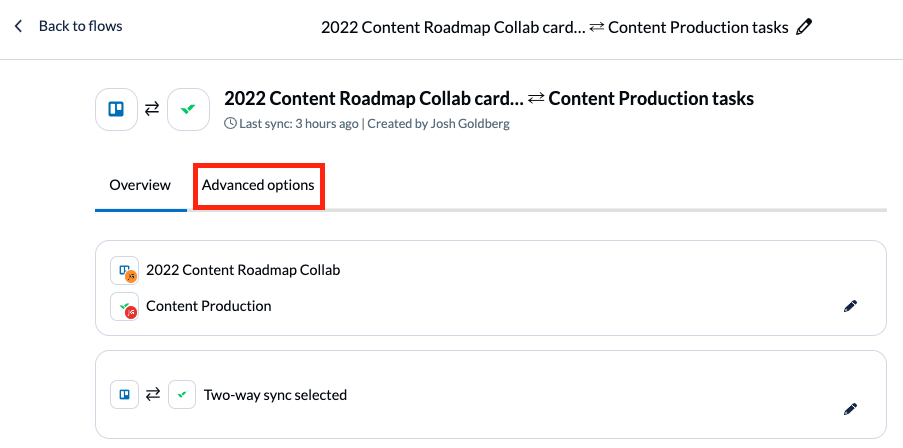
- Find your flow in the flow list and select the three little dots and click Edit.
- Now, select Advanced options.
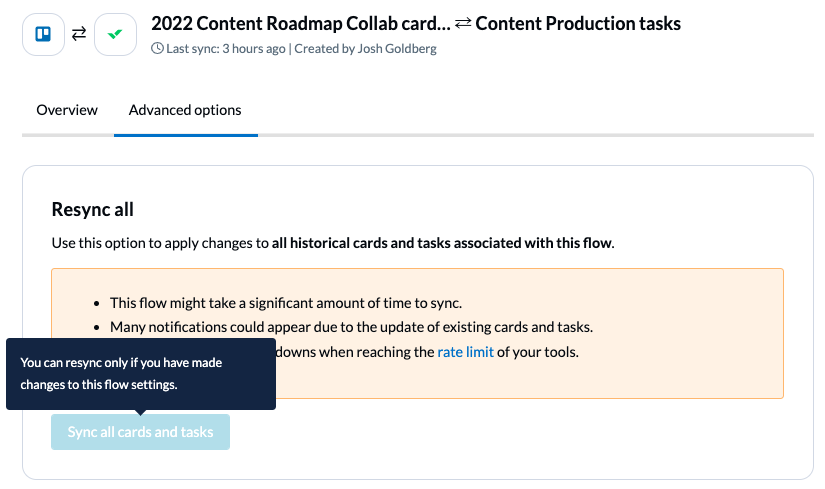
- Below Resync all, click the Sync all button. If you haven't made any changes to your flow, it will be greyed out (pictured below).
 Before you do, keep this in mind:
-
We will only sync work items up to the date set in your rules.
-
Your flow may take a significant amount of time to sync.
-
Your team could receive a flood of notifications, depending on the number of work items that need to be updated.
-
You might hit your tool's rate limit, creating significant slowdown in your tools.