Why Are Items Always Assigned to a Sync Bot Account in Wrike?
Are tasks that sync across two tools always being assigned to a Bot user? Here's how to fix it.
What's causing tasks to be assigned to the sync bot account?
Most likely, the workflow is automatically assigning the issue to the current connector (being the bot user in this case). A known workflow that does this by default on the cloud version of Jira is Business - Project management.
Verify that the Jira workflow is automatically assigning the issues by following these steps:
1. While logged in as a project administrator to the project in question, click the gear ⚙ icon at the bottom right.
2. Click on SUMMARY
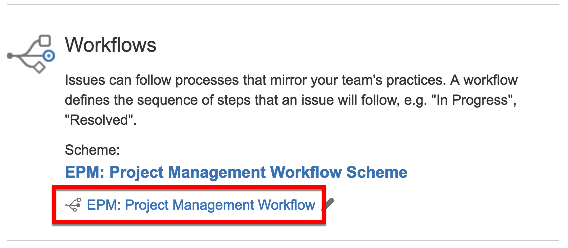
3. In the Workflow section, click on the second link

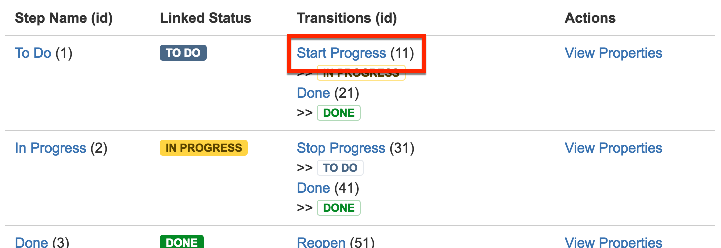
4. On the Workflow page, click on the first transition

5. Click on the Post Functions tab. The second step will be Assign the issue to the current user. That's the reason issues are assigned to the bot user.
How to fix this issue
1. From the POST FUNCTIONS tab where we left off, click the link called Create draft near the top of the page.
2. Click again on the first transition and on the POST FUNCTIONS tab. Move the mouse to the Assign the issue to the current user line; an x button will appear on the right side. Click on it to delete this step.
3. Click on PUBLISH DRAFT, near the top of the page. Keep a backup if you want.
Future issues replicated from Wrike should now be assigned properly!