In this article:
- Start building your workflow
- Add your blocks of work
- Choose your account and block of work
- Add another block of work
- Use flows to connect your blocks
- Set up your flows
Start building your workflow
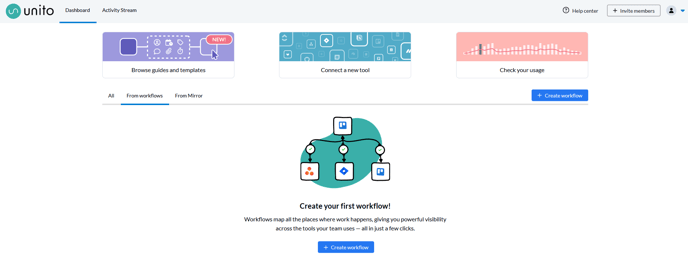
When you log in to your Unito account, you'll find a screen called From Workflows. If you've just signed up, that list should be empty. To start creating your first workflow, click on the + Create workflow button.
Add your blocks of work
Click on Add block
After clicking on Create a workflow, you'll be presented with this screen:
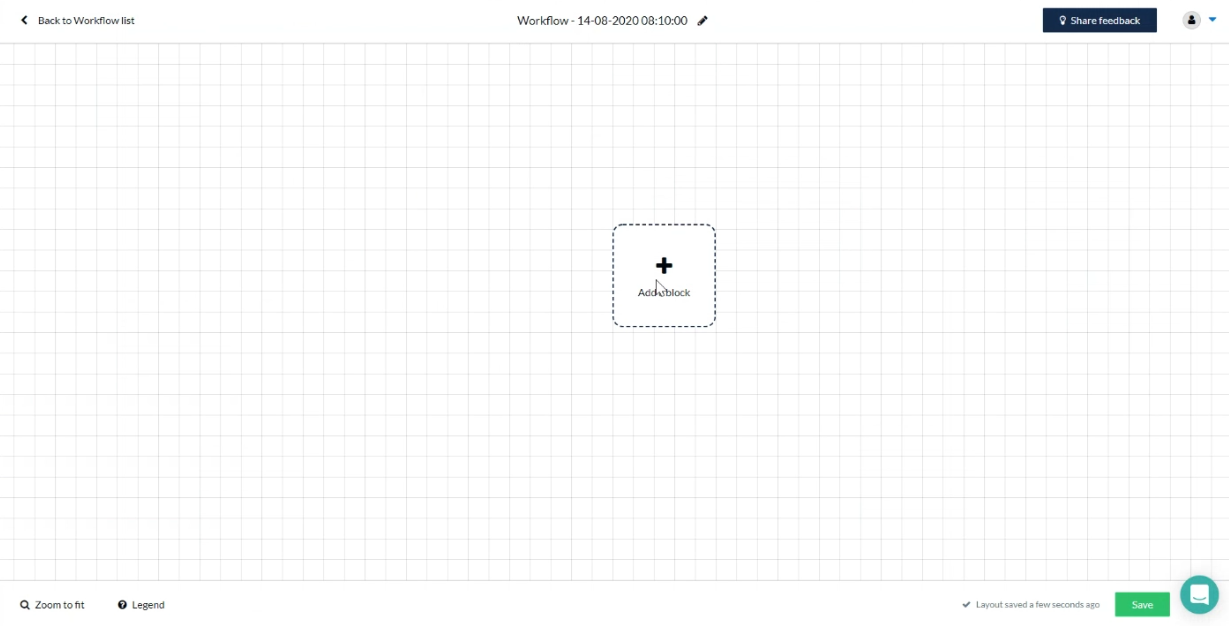
This grid is where you'll be building your workflows and customizing your rules. Notice that an Add a block prompt hovers wherever your mouse hovers. Click anywhere in the grid to add the first block to your workflow.
Choose your account and block of work
Once you click on the grid, you'll get a pop-up asking you where you get your work done.
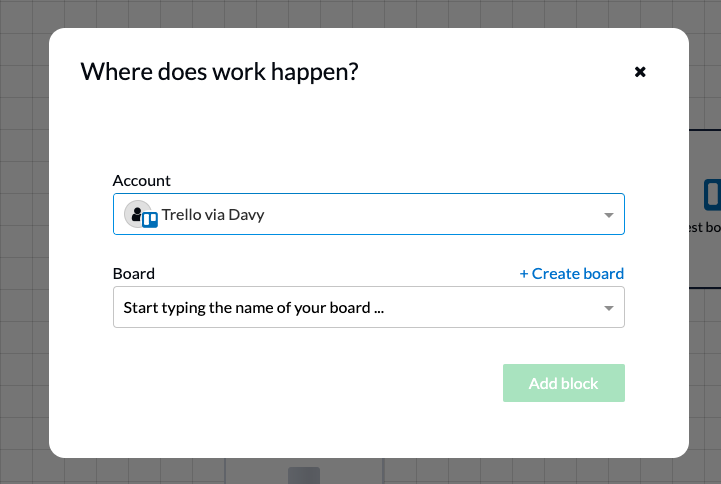
If this is your first time using Unito, the dropdown might be empty. No problem! Just click on Add another account and follow the on-screen prompts to connect your tool to your Unito account.
When you see the tool you need in the dropdown, click on it.
You'll now get a second dropdown, asking you to find the specific block that you need to connect. Find the right block, click on Add block, and voilà!
Add another block of work
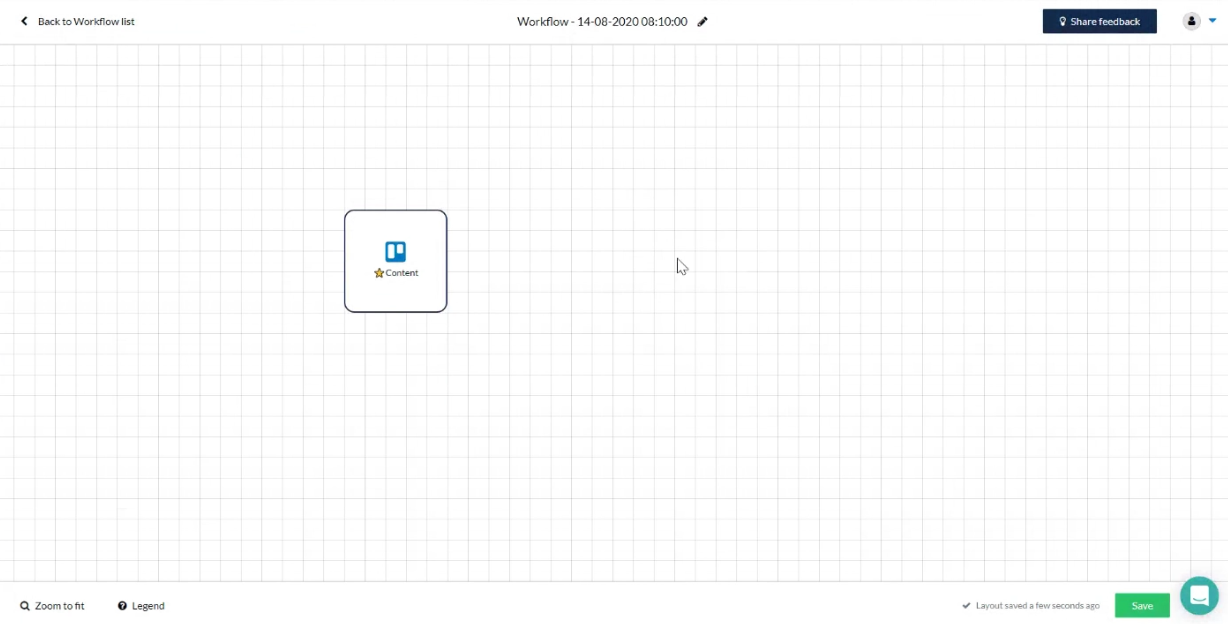
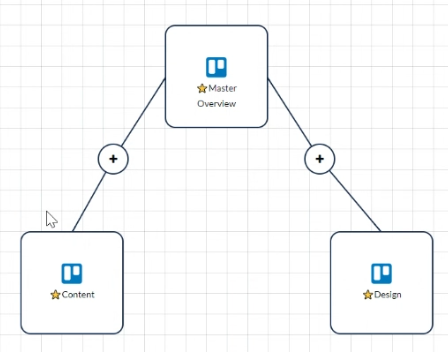
Now that you've successfully added your first block, just follow the process again to add the rest of the blocks in your workflow. Then you'll get something that looks a little like this:
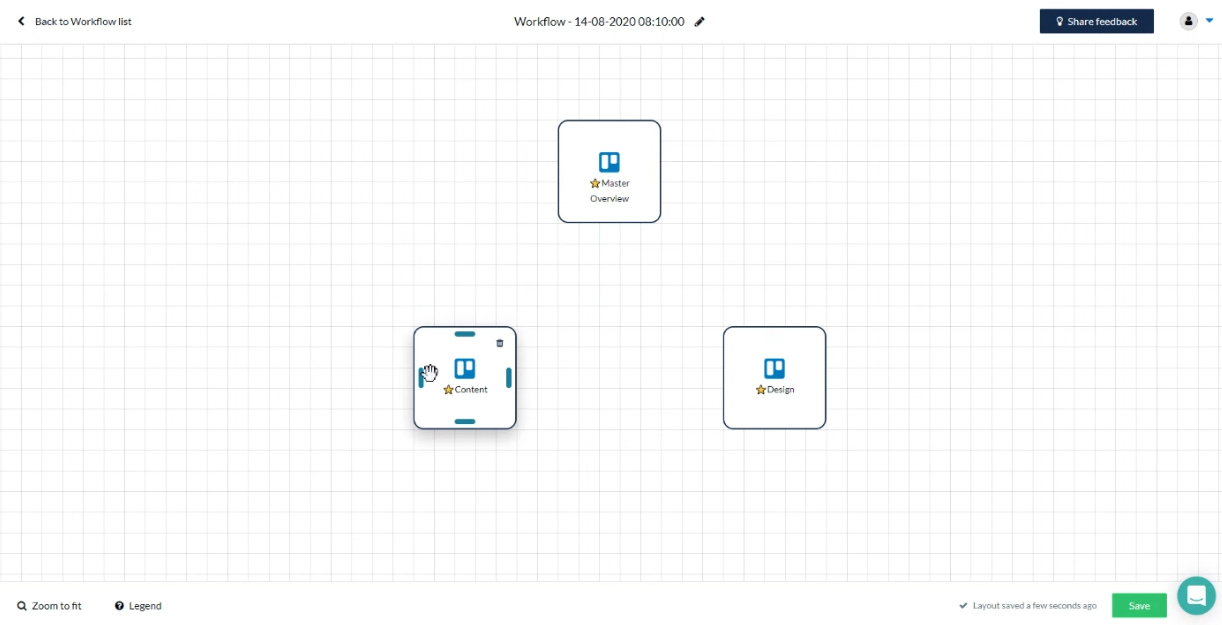
Now that we've added all our blocks, it's time to link them up.
Use flows to connect your blocks
Create a flow
When you hover over a block, you'll see four little lines appear around it.
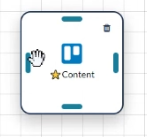
Hover one of those lines and you'll see a plus sign appear.
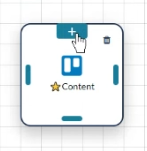
To connect two blocks together, just click on that plus and drag to one of your other blocks. That will create a line between them representing a flow.
The plus sign that appears on your flow shows that it's currently inactive. There are a few more settings you'll need to set up before your workflow is up and running, but first, you'll want to make sure you've connected all your blocks.
Now that you've mapped out your workflow, you're ready to get it up and running.
Set up your flows
To go from workflow map to running workflow, you need to set up your flows. Click on the plus sign on either flow to start.
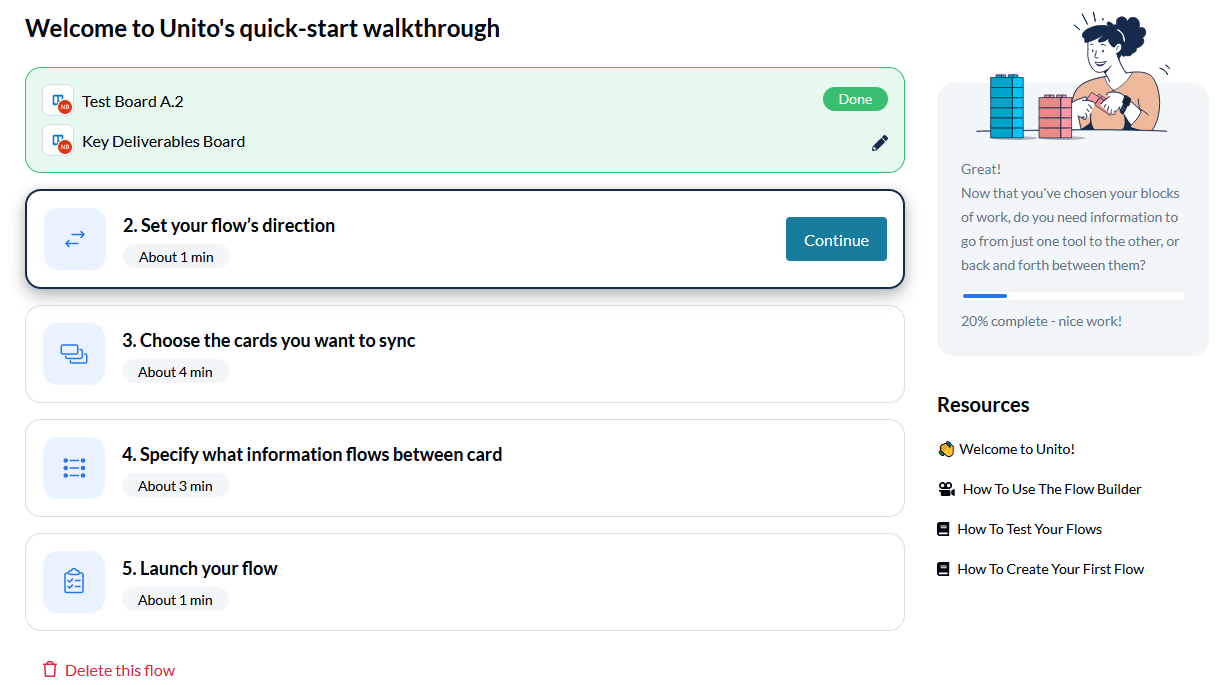
The quick-start walkthrough allows you to create rules for filtering and automating the flow of information. You can also customize your mappings, see a history of the last 100 changes in your flow, and more. But to get your flow up and running with default settings, all you need to do is make sure Auto-sync is toggled, and click on Save and sync.
Important note: By default, new workflows will only apply to work items you create after your flow goes live. So if you create a flow involving a Trello board, only cards created after your flow is active will be affected. This lets you test out your settings and make sure everything's working right before your flow is applied to a huge backlog of tasks. To make sure your flow syncs all historical items, you need to go to the Rules screen and delete the trigger covering work item creation time.
You're done!
If you've followed these steps, your workflow should look like this:
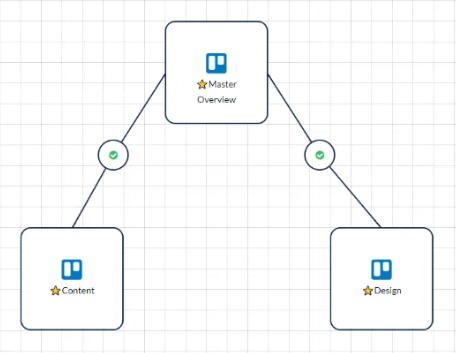
With this workflow, cards from the Design and Content boards will be synced with the Master Overview board, and vice versa.