In this article:
How to install Unito from the Apps Marketplace
You only need a few clicks to install Unito in your monday.com board. Follow that link or these instructions:
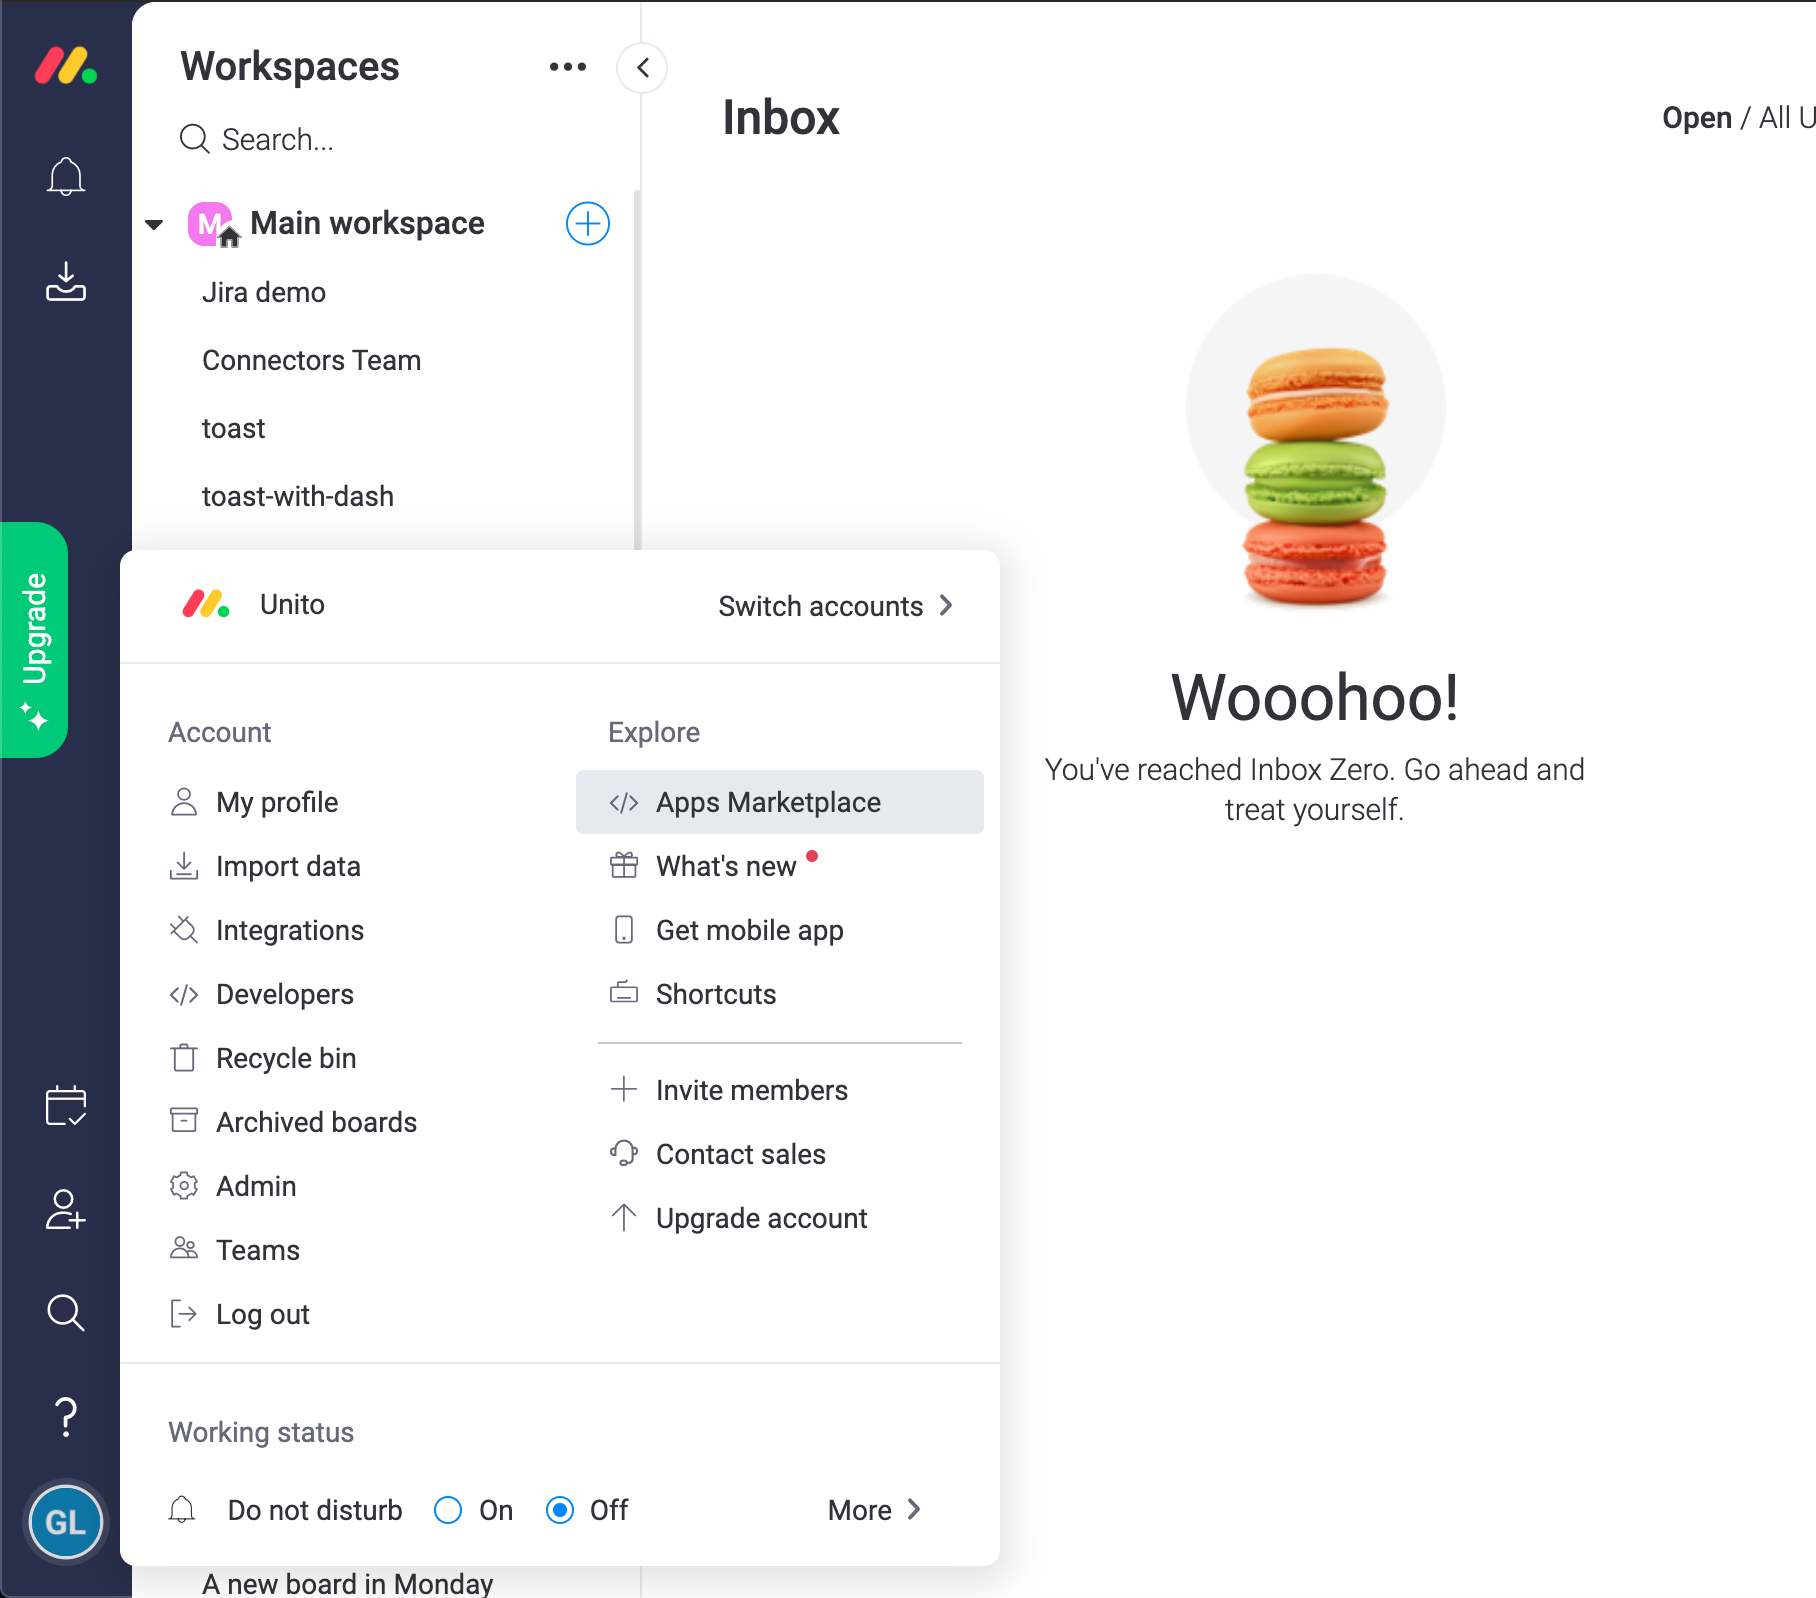
Clicking on your profile picture (or initials) at the bottom left of the screen in monday.com:
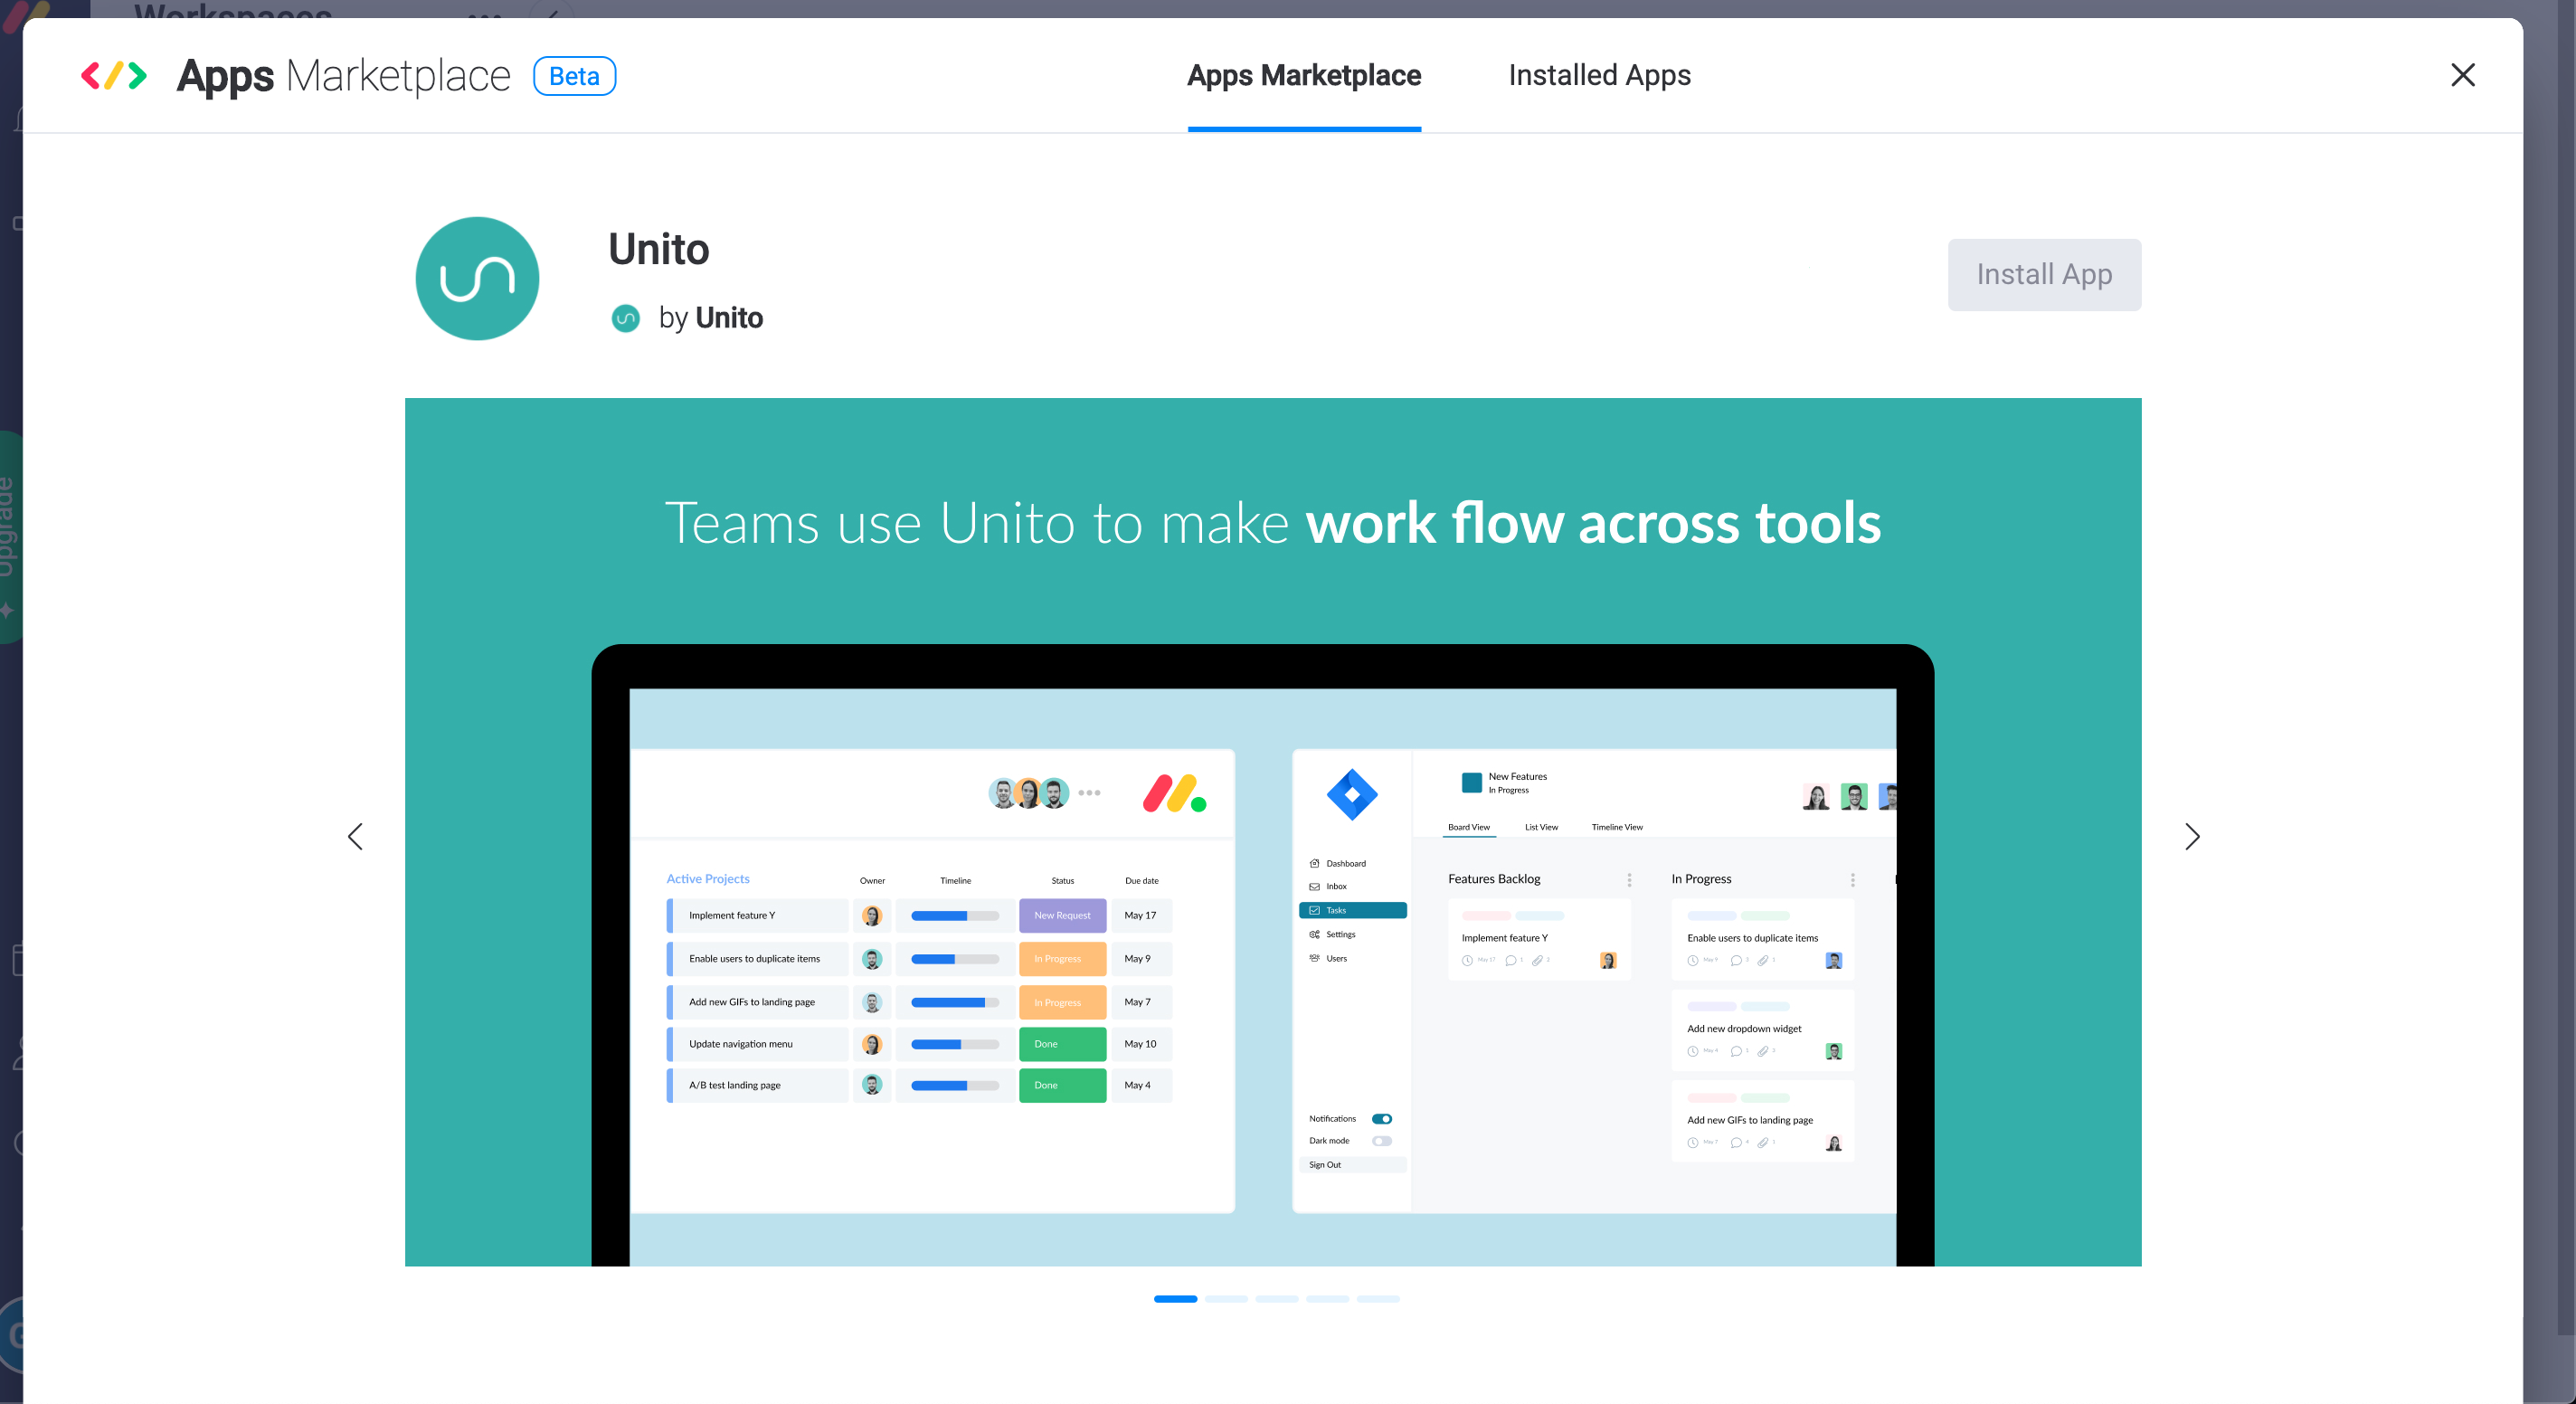
From there, find Unito in the marketplace under Integrations and click on it.

Finally, click on Install App.
From there, you'll have to click through a few screens to authenticate your monday.com, then that's it! You've successfully installed Unito! Now all that's left to do is add Unito as a view to your monday.com projects.
How to add Unito as a view in your monday.com projects
Once you've installed Unito, adding it to your projects is super easy. Just go to the top-left of your project and click the view dropdown under your project's name. The exact wording of the dropdown will depend on what view your project is using. In this example, it's Main Table.
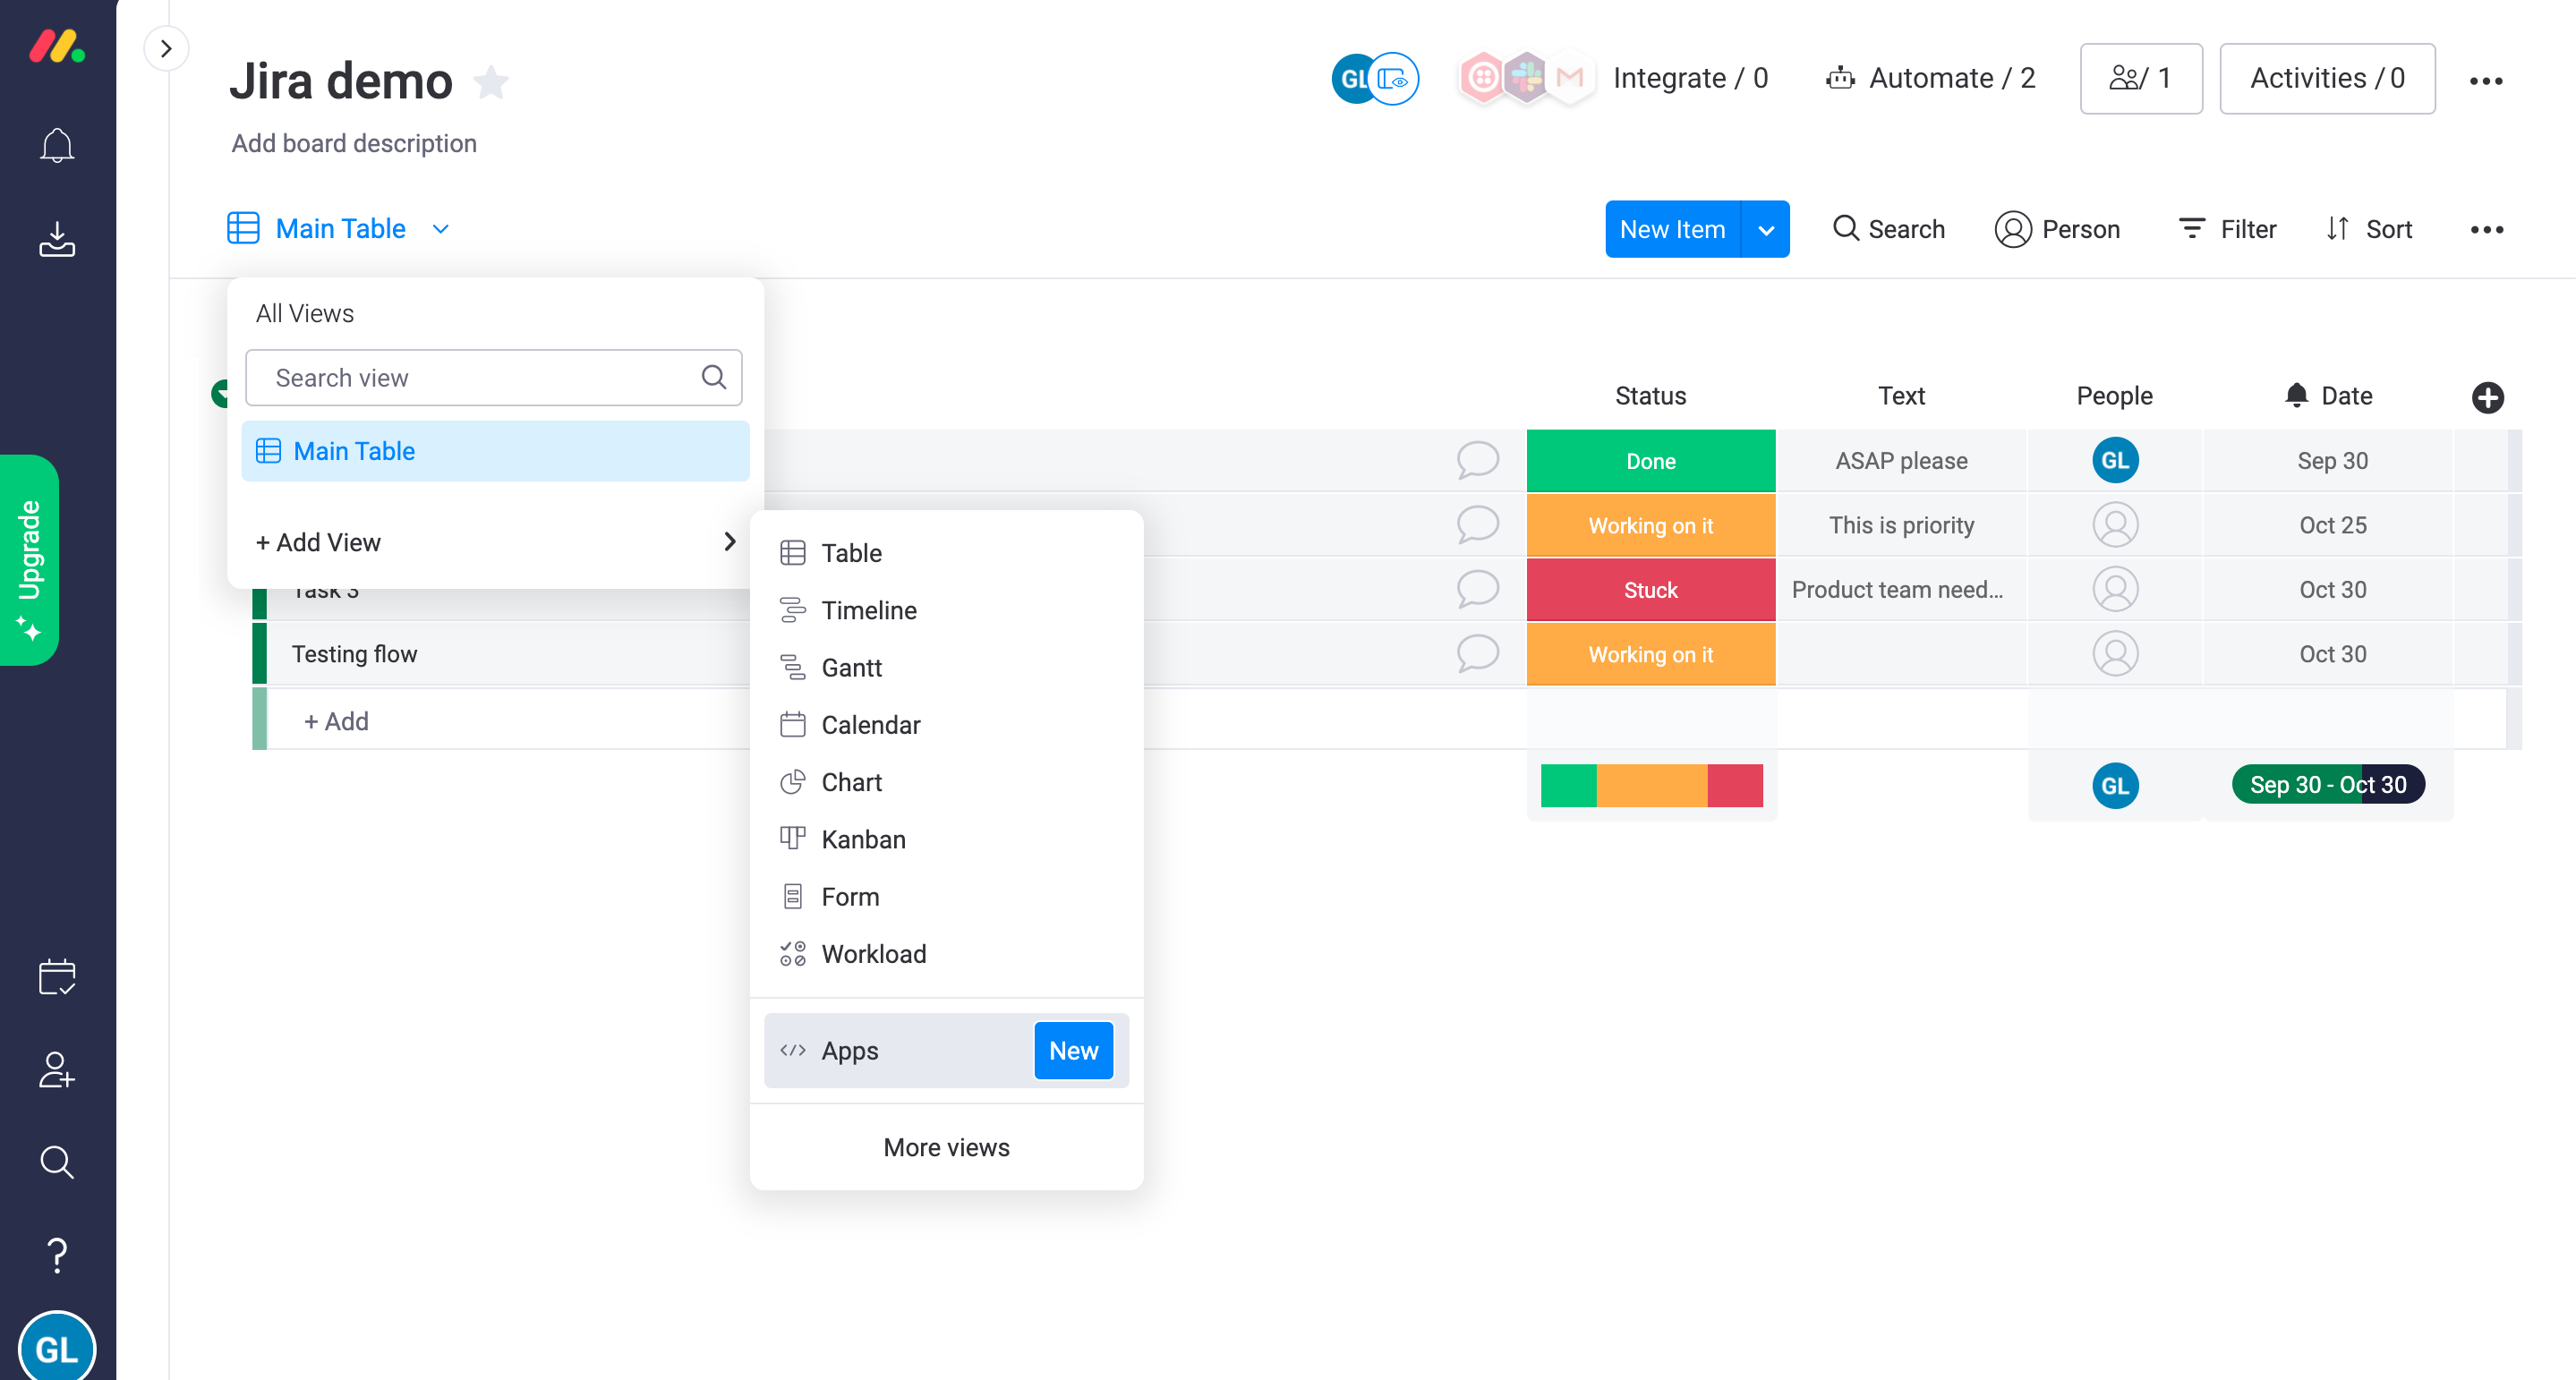
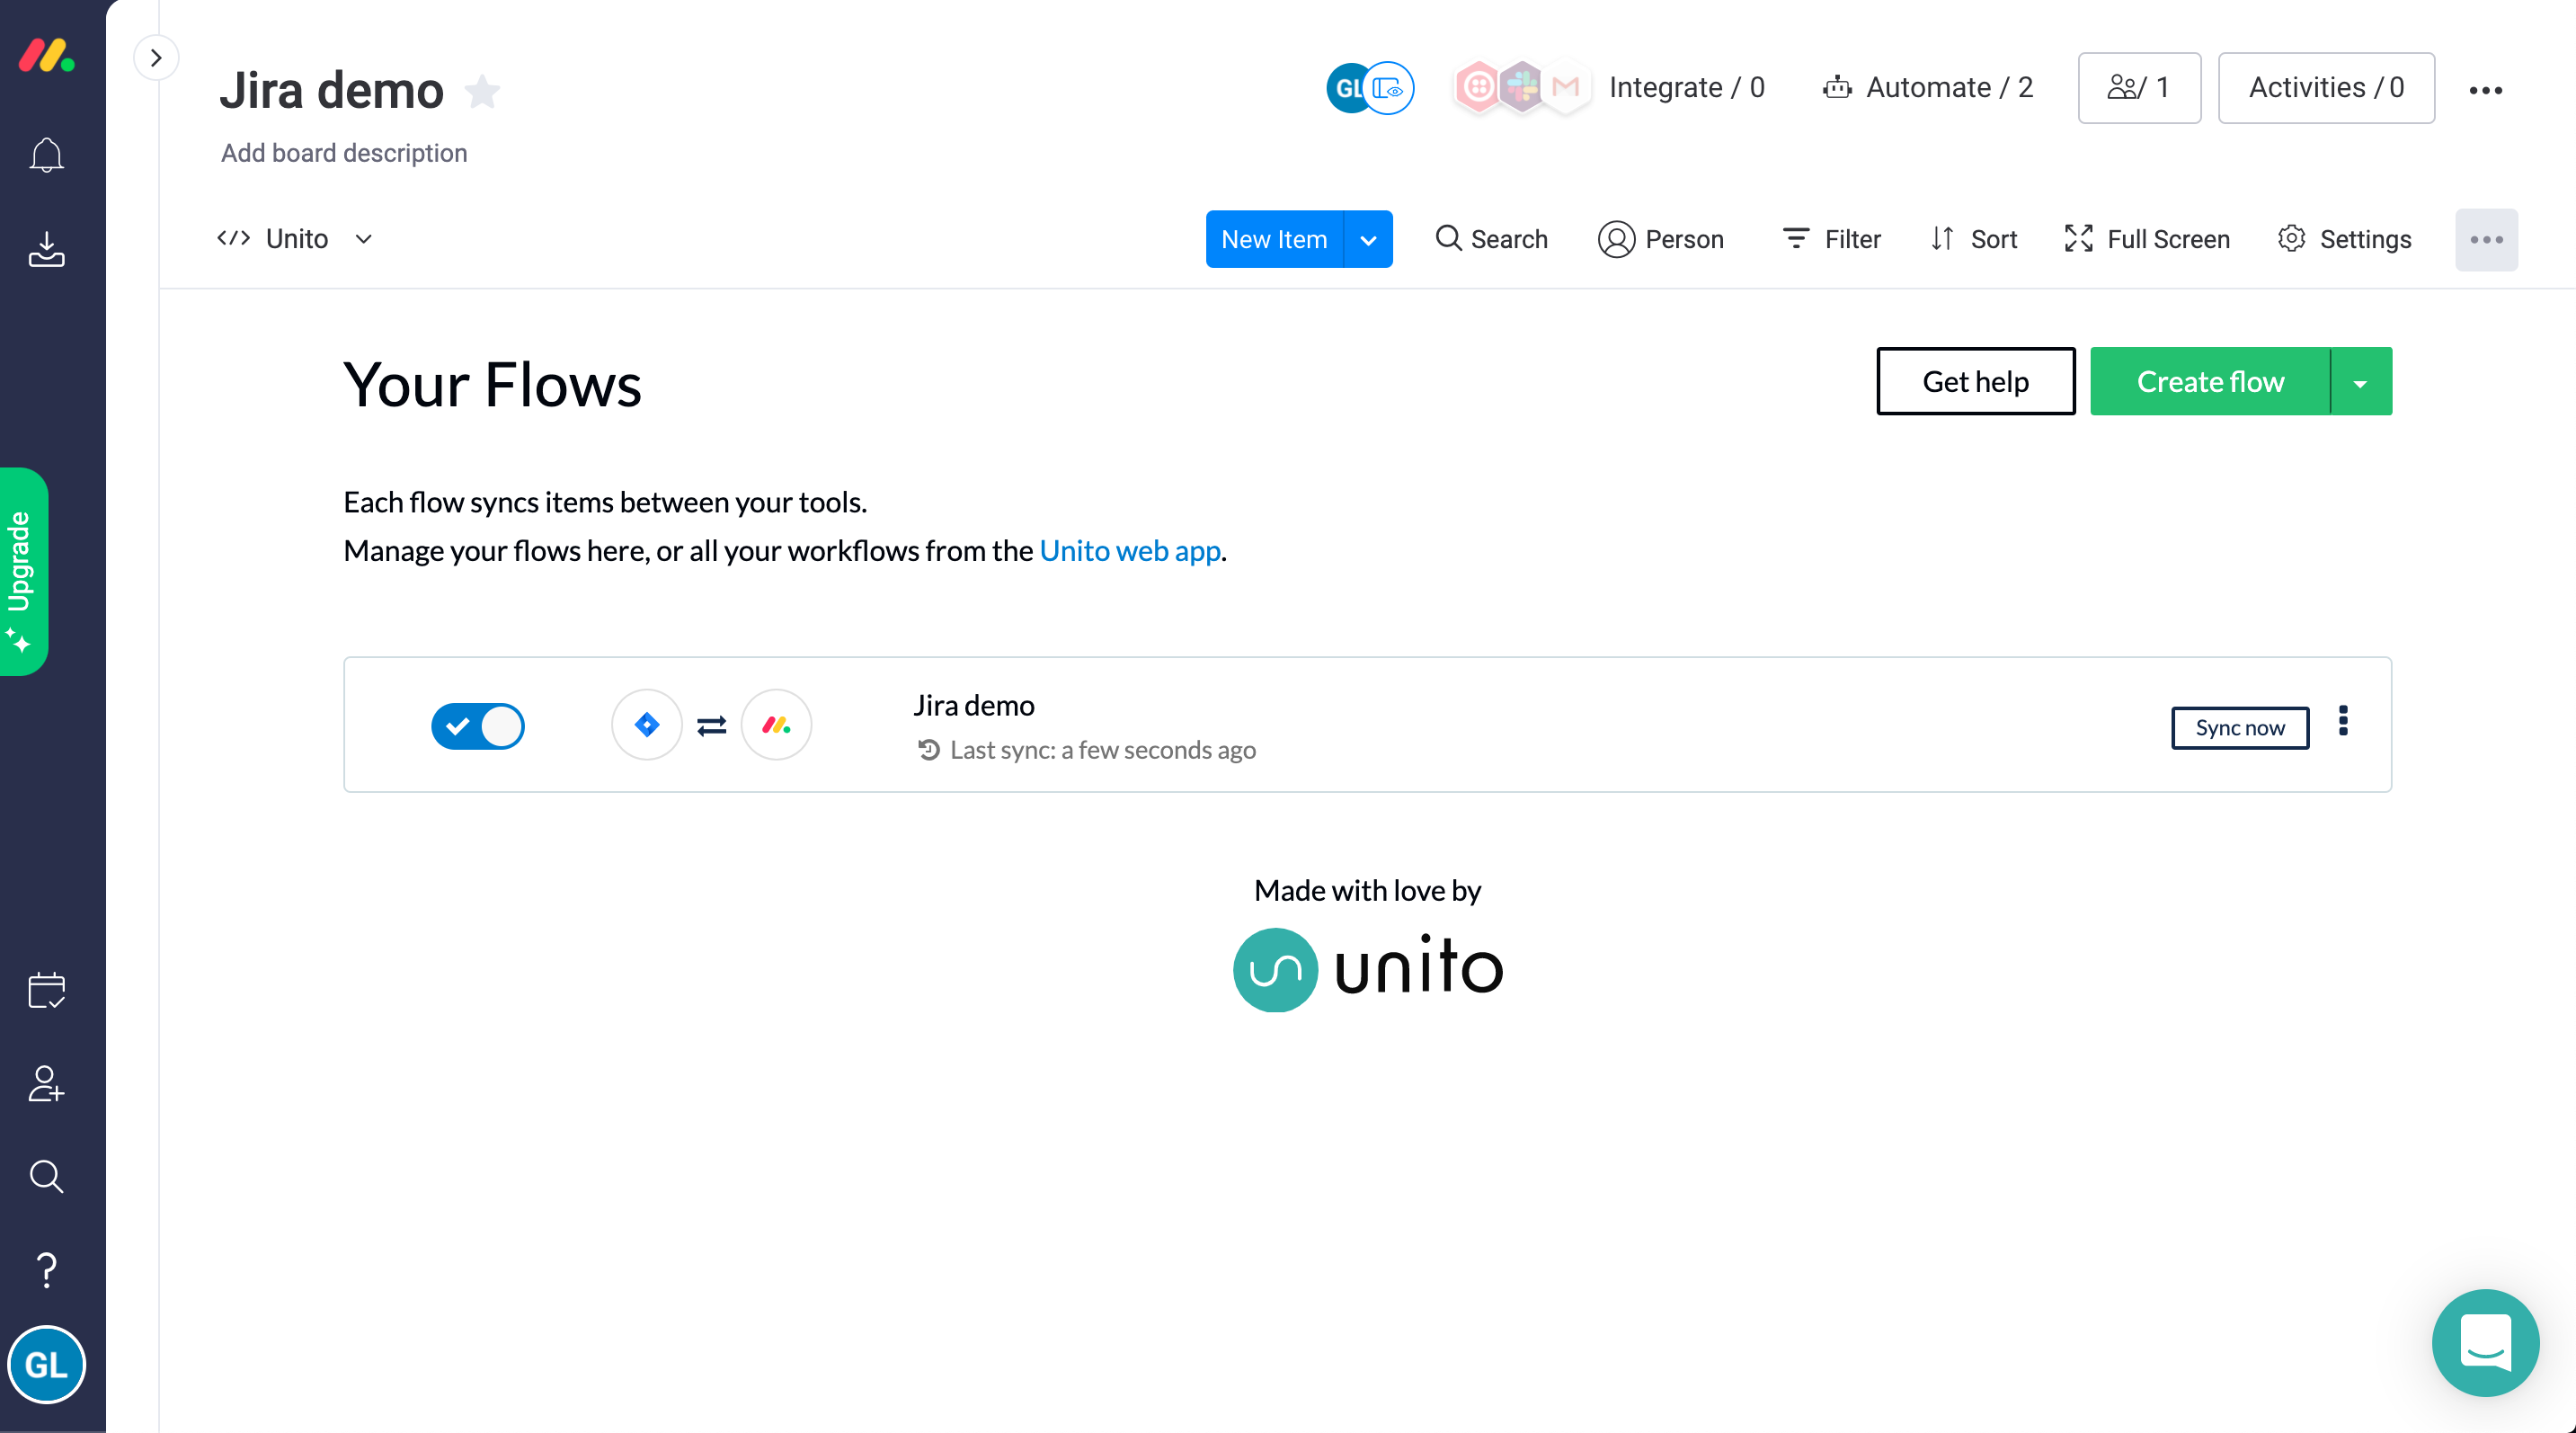
Once you've got the dropdown open, click on Apps. Choose Unito, and that's it! Note that we automatically filter your flows per project to keep things simple. So for this Jira demo project, for instance, accessing your Unito view would only show flows that apply to this project.
This means you'll need to add Unito as a view for each monday.com project you need Unito for. It takes a little longer, but it keeps things clutter-free and streamlined.