
Using Wrike and Unito Discover how to best use Wrike and Unito to create a single source of truth, providing executives with a vital overview of projects.
What this article covers:
The value of an executive project dashboard
What executive or manager doesn't dream of having a clear live view of all of their organization's progress?
But how is that possible when every team uses a different work management tool, each suited for their needs? Do you have to wait for the weekly (or monthly) status reports to find out what’s happening? Is your reporting tool outdated because staff is forgetting to update it?
This guide will show you how to best use Unito and Wrike to gather a live dashboard of projects in Wrike, some of which are managed in Jira.
How to build a live executive dashboard in Wrike using Unito
1) Set up the blocks of work you want to monitor
Choose and connect the Jira or Github blocks you want to monitor in Wrike through Unito.
Then select the other Wrike projects you want to monitor. Let’s say you have a big launch in a month and want to make sure every department is on track. You’ll want to follow the product, marketing, and business teams simultaneously.
2) Bring all these Wrike projects under a folder
Once you’ve selected the projects (or folders) you want to follow, tag them in a master folder that you’ll call “Great Big Launch” for our example. From there you can easily see the “Folder View” that shows you every task in these projects.
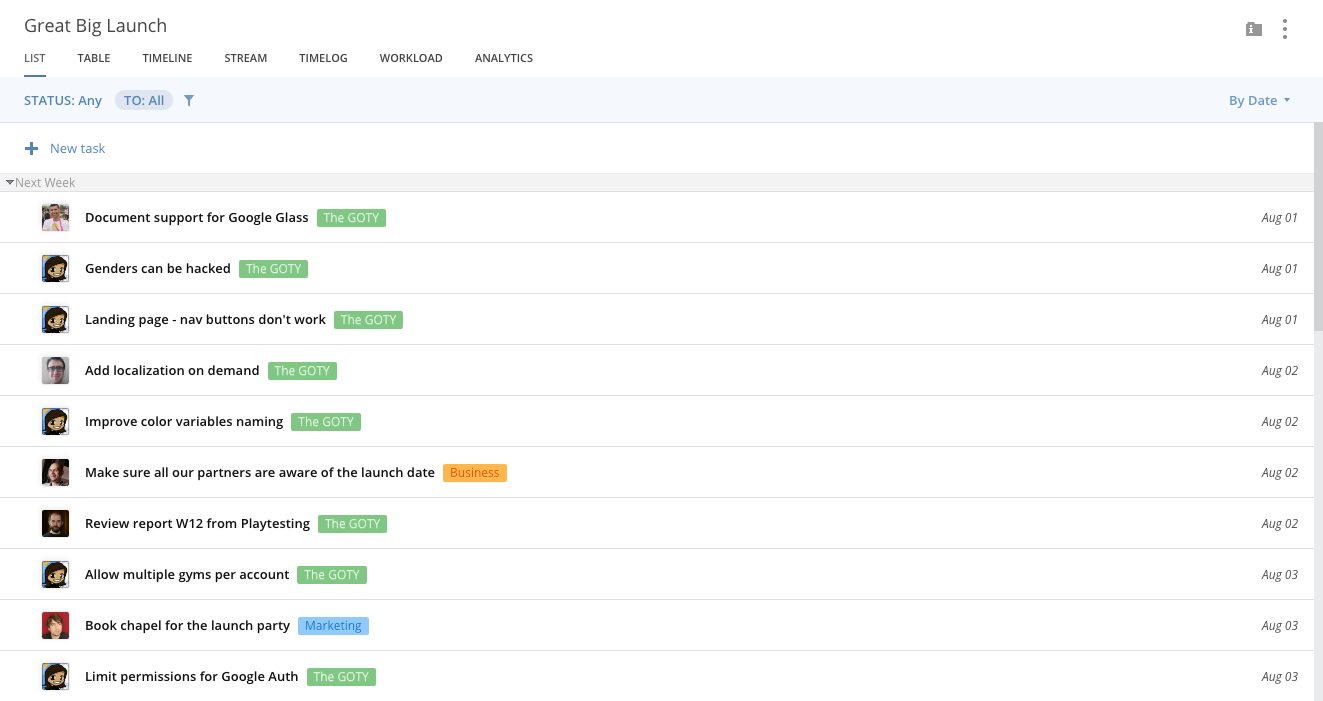
But you probably don’t want to have this level of granularity.
Fortunately, Wrike has a great tool for executives and managers that want to have a birdseye view of what is happening in their organization: Dashboard. We’re going to set this up.
3) Set up the Wrike dashboard
For our launch we want to monitor 4 different things so we will set up 4 boards:
-
A live board for an ongoing stream of activities that are related to you.
-
Another board where we’ll follow the different project managers working on the big launch
-
A board that monitors all the overdue tasks so you can see what falls behind and react quickly.
-
Finally, a board that monitors all the tasks in the Launch folder.
4) Set up the live board
This one is the easiest:
-
Click on “DASHBOARD” in your left menu, from there you can start a new dashboard (feel free to name it whatever you want).
-
Click on “ADD WIDGET” and in the drop-down menu check “ACTIVITY STREAM”, this will give you everything that’s related to you in Wrike so you don’t miss anything important.
5) Set up the project manager widget
The options in the drop-down menu can seem minimalist at first but Wrike lets you add nearly everything you want to your dashboard. But for that, you need to get out of your Dashboard view.
Go back to the Great Big Launch folder:
-
Click on the funnel at the top of the tasks list
-
A side menu appears on the right, this is a list of rules you can add to the folder.
-
Go to Assigned and choose the assignees you want to follow
-
From there you’ll see only the tasks assigned to the managers you want to follow
-
Feel free to add rules and finally click on the menu icon and add this filtered view to your Dashboard.
6) Set up the Overdue widget and the Launch view
For these ones you just have to repeat the steps above. Go under Rules > Tasks to do > Overdue for the Overdue widget.
For the Launch widget, it’s even simpler. If you want to follow every task, there's no need to apply rules. Just click on the menu icon and add the view to your dashboard.
You should now have a nice dashboard with all the information you want to monitor at the same location. The dashboard will always be up to date. No need to dive into individual projects or other tools, or ask anyone for a status report.
We've introduced you to the Dashboard view with cross-department projects but feel free to tweak it to your needs!
Recommended Unito settings
Try out these settings to get the most out of your flows:
-
Map your Jira and Wrike users, so you can see in a glimpse who is working on what.
-
You can use rules to filter the Jira issue types you want to sync, avoiding bug-related issues to flood your dashboard.
-
Want to know the priority of a task or its status? Don’t forget to map your Jira workflow.